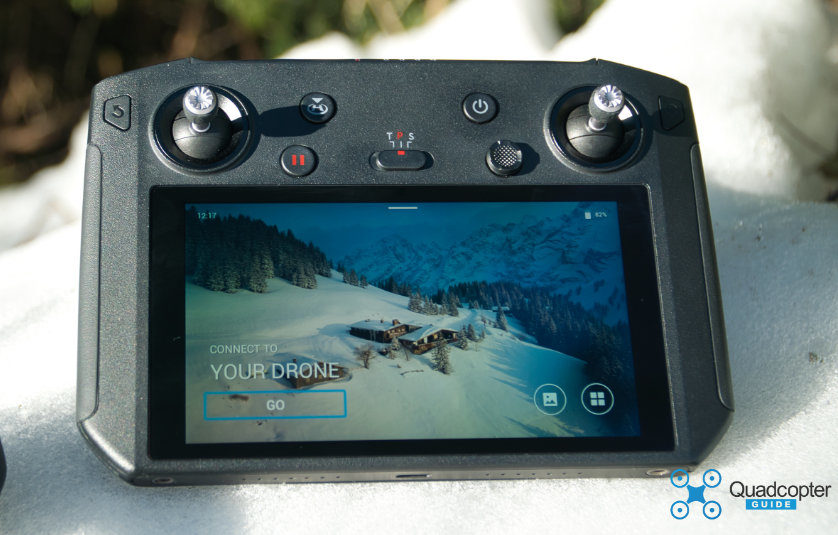
After the leaked images we have seen for a while now, DJI released the new Smart Controller. In our DJI Smart Controller Review below, we will go Hands-On with this latest must-have gadget and show you what it is capable of. We will also show you some hidden features which aren’t so obvious, but let’s get this DJI Smart Controller Review started!
DJI Smart Controller Review – Our Hands-On Video
If you want to check out the pros & cons of the DJI Smart Controller in our Video Review, you can check it out here: Don’t miss that Intro sequence!
What is the DJI Smart Controller?
The Smart Controller (currently) is essentially one of DJI’s normal Mavic 2 remote controls with a Crystal Sky Display built-in. It allows you to use just the remote control and no longer having to connect your smartphone in the oftentimes fiddly remote controls mobile device clamps. Besides just saving you time when getting ready to take your next drone flight, the remote of course features some other pleasant improvements over a smartphone connected solution, more on this in a bit. Note, that according to DJI this remote control will support further aircraft in the future.
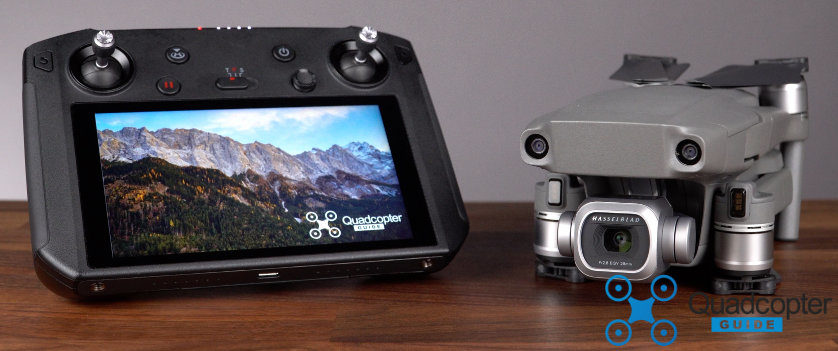
The new DJI Smart Controller with a Mavic 2 Pro
What makes the DJI Smart Controller attractive?
We’ve covered the obvious one with having to deal with fewer cables and fiddling with your smartphone or tablet, that isn’t it though. Similar to what drew us to the built-in display on our Phantom 4 Pro +, the crystal clear and super bright HD display. The built-in display features a 1000 nit brightness display. Not only does the inherently bright display help you see the screen in the sunlight, but there’s also something called SRE mode (Sunlight Readable Enhancement) which helps increase the viewability further. The iPhone X and the iPhone XS Max reach a peak brightness of 725 nits. Most smartphones brightness-wise lie in a range of just under 500 nits to about 675 nits, as a comparison.
OK, you get it, a super bright display. What about the size and resolution? The Smart Controller features a 5.5″ 1080P FullHD display. Even the pixel peepers amongst us will not notice individual pixels. No DJI Smart Controller Review is complete without a look at some of the specs, let’s take a look at those next. Don’t miss our detailed review past the specs though!
What are the features of the DJI Smart Controller?
Specs and capabilities
- Custom Android Operating System with DJI GO 4 App
- SRE Modes (Sunlight Readable Enhancement)
- Overall Enhance
- Dark Part Enhance
- Bright Part Enhance
- Built-In Display capable of playing back up to 4K 60fps videos in H264 or H265.
- HDR 10 bit videos are limited to playback of 4K 30fps
- Videos can be displayed on an external monitor via the HDMI port
- Extended storage capability: The Smart Controller’s storage can be expanded by using microSD cards.
- Expanded temperature operating range: -4° F (20° C) to 104° F (40° C).
- GPS + GLONASS receiver built-in
- Ability to share photos and videos with a smartphone
- Dimensions
- 177.5 × 121.3 × 40 mm (antennas folded, and the control sticks unmounted)
- 177.5 × 181 × 60 mm (antennas unfolded, and the control sticks mounted)
- Weight: Approximately 630 grams (Our specimen weighs in at 699 grams on our kitchen scale)
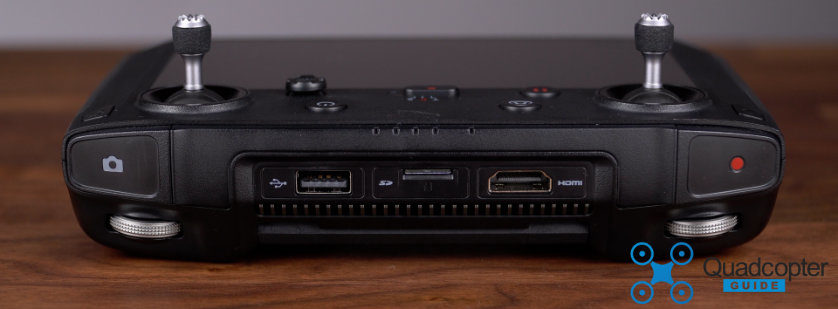
The new Smart Controller is the first option that allows HDMI out on an Ocusync 2.0 aircraft such as the Mavic 2 Series
Ports, Slots & I/O
- HDMI: Port for video output
- microSD card slot: Accepts up to 128 GB
- Microphone & speaker
- Air intake & vent
- Stick storage (2 sets of sticks included)
- Customizable buttons C1 & C2 & 5D multidirectional button
- USB-C: for charging with included quick-charger or updating with DJI Assistant 2
Special functions of the Smart Controller
The Smart Controller features a few more buttons than on a standard Mavic 2 Series remote control. One very useful feature on this new remote is the shortcuts which are accessible through special button combinations.
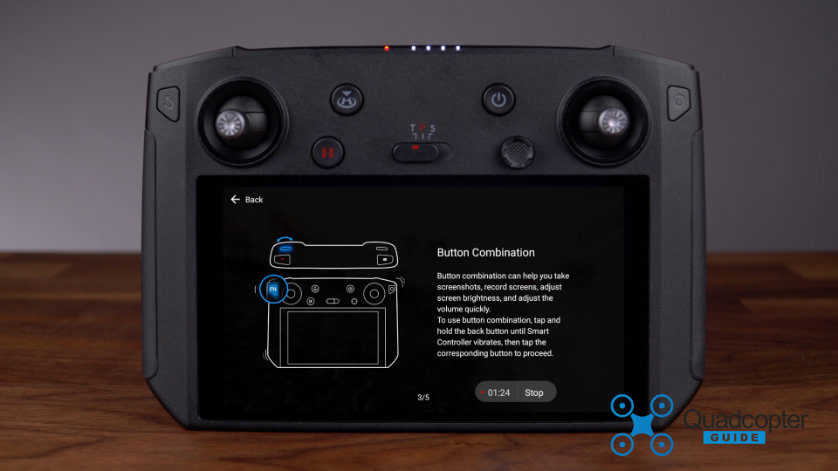
One example of button combinations on the new Smart Controller
Buttons & Dials
- Back Button / Function Button: Press once to return to the previous
page and press twice to go back to the homepage. Hold to view a guide to using button combinations.- adjust brightness quickly and volume
- screenshot or screen capture
- back button combination with 5d button: home, apps, quick settings, recent
- 5D (5Directi0nal) Button: also programmable. Default functions:
- Up: Recenter gimbal/move gimbal downward Down: Focus switch/metering
Left: Decrease EV value
Right: Increase EV value
Press: Open DJI GO 4 Intelligent Flight Modes menu
- Up: Recenter gimbal/move gimbal downward Down: Focus switch/metering
- RTH (Return-to-Home) Button: Hold for 1 sec to activate RTH, push again to cancel
- Pause Button: press once to exit tapfly, active track and other intelligent flight modes
- Flight Mode Switch: T,P,S mode (tripod, positioning, and sport mode)
- Tripod Mode: The maximum flight speed is limited to 2.2 mph (3.6 km/h)
- Positioning Mode: Works best when GPS signal is strong. Uses GPS, Vision Systems, and Infrared Sensing to stabilize, avoid obstacles, and track moving subjects. Advanced modes such as TapFly and Active Track are available in P-Mode.
- Sport Mode: The handling settings are adjusted on your drone to enable enhanced maneuverability. Note that vision systems are turned off in Sport Mode!
- Power Button, Status and Battery Level LEDs: Once powered on the power button is used to wake the screen from sleep mode
- Confirm Button/ C3: Confirm button without linked Aircraft. The button will be customizable in DJI GO 4 App (future firmware)
- Gimbal Dial: Adjusts Gimbal position
- Record Button: Starts and stops Video Recordings
- Focus/Shutter Button: Half press this button to focus then press fully to take a photo
- Camera Settings Dial: On the Mavic 2 Pro this adjusts the exposure compensation when in Program mode, Aperture when in Aperture Priority or Manual Mode, or the shutter when in Shutter Priority mode. On the Mavic 2 Zoom it adjusts the Zoom of the camera.
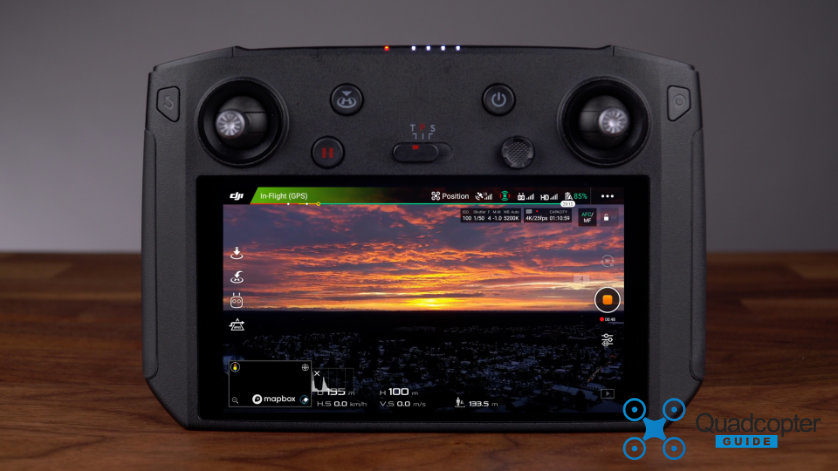
The DJI Smart Controller featuring it’s 5.5″ FullHD display
For further details about individual functions check out the Smart Controller User Manual.
Powering on the DJI Smart Controller
As with most DJI devices you can push the power button, let go and hold the power button until you hear the chime. Also new to the Smart Controller, you can just push and hold the power button. You aren’t required to push and let go. You can use the power LEDs to see the count-up, a vibration will let you know the device is powering on. You can let go of the button now. Same steps to turn off the device.
Upon the initial powering on of the Smart Controller, you will be asked to activate the device. Select a wifi-hotspot, and log into your DJI account.
Most likely there will be a firmware update available for your device. Update it using the build in updater, or better yet use the DJI Assistant 2 App on your PC or Mac. You have to use the Assistant linked, as it has to be version 2.0.6 or newer.
Linking the Smart Controller to your Drone
I was surprised by how quickly and pain-free the linking procedure was. You just tap Link from the pull-down quick settings menu on the Remote and then tap the link button opposite of the microSD card slot on your powered on Mavic 2. Viola, Done. A green indicator on the Remote confirms the Linking is successful.
You can also press C1, C2 and record button simultaneously to activate the linking procedure from the Smart Controller. Another third option to link the new Smart Controller is to use the linking button inside the DJI Go 4 App.
Controlling and Flight Modes of the new remote:
The default controlling mode is mode 2, however, you can change this to mode 1 or 3 if you want. I haven’t met anyone that flys in a mode different than mode 2 but i’m sure there’s people out there :).
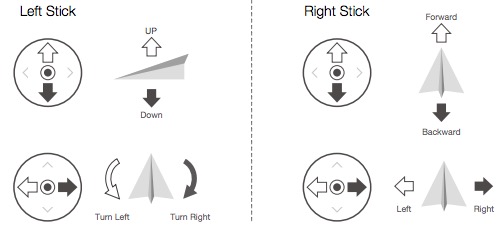
Mode 2 Method of controlling drones & quadcopters
Regarding the flight mode which is selectable via the flight mode switch:
Regardless of which mode the switch is in when you power on the device, it begins in P-mode. You have to enable other modes in the DJI GO 4 App.
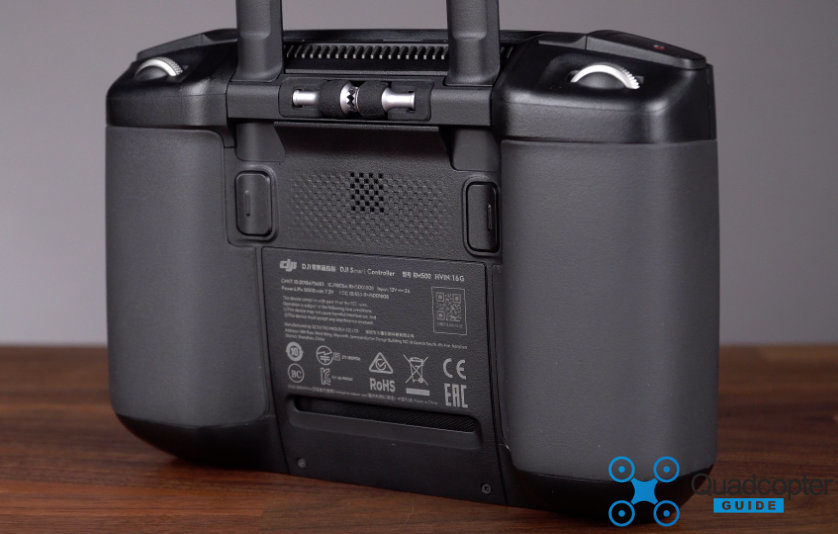
The rear of the DJI Smart Controller
Navigating the Interface
You can navigate the menus on the Smart Controller outside of the DJI Go App by touching the screen, using the 5D button or even using the control sticks. You can confirm a selection by pressing the 5D button, touching the screen or using the confirm button. Inside the DJI Go 4 App, of course, the sticks are used to control the drone and the 5D button is programmable to custom settings.
SRE Modes (Sunlight Readable Enhancement)
Not only does the Smart Controller feature a super bright 1000 nit display, but it also features 3 different SRE Modes. SRE Modes are extra modes which are enhancements, to allow even better visibility or readability of the display. It allows users to bump up the highlights or shadows of the image on the display, individually or together. This helps users see particular areas of the screen more clearly when sunlight is strong. You can think of SRE as a selective contrast improvement.
Smart Controller Bundles
The new DJI Smart Controller is available as a Standalone product or as a Bundle with certain drones. By purchasing a Bundle, you can save quite a bit of money.
DJI Smart Controller Mavic 2 Pro Bundle – Check Price Here.
DJI Smart Controller Mavic 2 Zoom Bundle – Check Price Here.
DJI Smart Controller Standalone Remote Control – Check Price Here.
Recommended microSD cards
STAY IN TOUCH!
If you’d like to stay up to date with all the latest drone/gimbal news, rumors, and reviews, then follow us on YouTube, Twitter, Facebook, Instagram or sign up for our email newsletter.
Purchase your next drone directly from DJI or retailers like Amazon, B&H, BestBuy or eBay. By using our links, we will make a small commission, at no cost to you. Thank you for helping QuadcopterGuide grow!
