

How to test your microSD memory card’s Integrity
How sure are you that your memory card is genuine and also up to the task of saving all files without corruption? Was that crazy deal on the name brand card too good to be true? It is essential for our microSD memory cards to perform when it’s time to get the footage we want. Today we detail how to test your memory card to ensure it’s up to the task. We stumbled onto this topic while using our old GoPro Hero 3 black on a project and got the dreaded bicycle icon on the GoPro’s display. After a quick search, we found out that this was the file repair icon. Since we make it a point to purchase genuine name brand cards from Sandisk or Lexar through authorized dealers it was a little frustrating at the time to get the error. The error can occur when the GoPro has issues or the memory card is having problems. In our case the file was intact and only the last few seconds of the clip weren’t captured, but not wanting this to occur in the future we made our way to find a tool which could test the integrity of the microSD memory card, or any memory card really. There seem to be quite a few tools for windows such as H2testw which is a german tool available here (English translation here). It was developed by a german computer magazine to check for physical errors on memory cards. For mac users, the App F3X is available. It is a command line tool with an available GUI called F3X. To download the app without having to compile etc., scroll to the end of this page here and find the latest version for download. Here is F3X in action: F3X first writes files to the available space on the card selected and then reads them back to check for issues. It is always important to backup any important data from your memory cards before starting any kinds of tests and then erasing or formatting the card to ensure all available space is being tested. When the checks are complete you will be informed if your memory card is up to snuff or if there were issues found. Note however that the controller on the microSD card itself can block out bad sectors of memory when it runs across them. We still find it useful to run a check when first getting a new card or to ensure that an older card is still fit for duty. In our case of our GoPro 3 Problem, the card checked out fine, it is a genuine card....
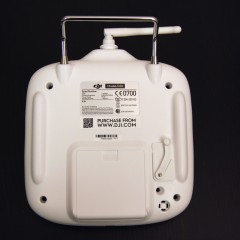
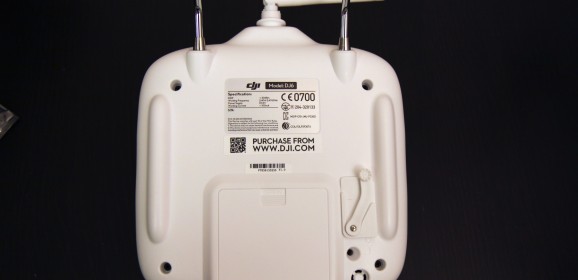
Fixing and recalibrating broken X1 Channel on DJI Phantom 2
When I first got my DJI Phantom 2 with the H3-2D Gimbal everything worked fine at first, then it seemed that intermittently the X1 channel wouldn’t calibrate right. I could sometimes get -1000 to 1000 movement but to get that movement I had to quickly move the lever and try to hold pressure on the base of the Camera movement lever to get it to move the whole range. This was frustrating, to say the least. At the first occurrence of this issue, i took the Remote Control apart to see if it was just the lever not making contact with the pot on the PCB Board. The pot is the little device that turns the movement of the lever into a signal which in turn moves the camera once received by the Phantom. The first time this happened I messed around enough to somehow get it to work again. I just had this same thing happen again and finally figured out how to fix it. Note: I know the RC Assistant is only used to calibrate the normal control channels and not the X1, but this, in my opinion, is what causes this fix to work!! Steps: Turn on the Remote Control and launch the RC Assistant Software (not the Phantom 2 software) Plug in the Remote Control with the supplied USB cable Calibrate the normal Control Channels. (after step 1 is complete read on) After you move the control levers in all directions don’t click Next yet. Move the X1 channel to both extremes a few times slowly. For this step, I had the remote taken apart and moved the pot (the little electrical box with a philips style yellow top) with a philips screwdriver, but you should be able to achieve the same with just moving the lever. Once again: I know that the X1 channel isn’t calibrated officially at this point but it needs to be moved at this point just like you would during a calibration. Click next and finish the calibration. Turn off the remote control and quit the RC Assistant Software. Unplug the remote control. Plug in the USB cable into the Phantom 2 quadcopter. Now start the Phantom 2 Config App (the one used to upgrade firmware for the actual Phantom 2 quadcopter). After turning on the Phantom 2 plug it into the computer. Calibrate the remote control again. Calibrate the X1 channel. Now you should have a working X1 channel again!! These are the steps I followed to get my X1 channel working again, I hope they worked for you as well. I would have had to send my DJI...
Get your own!