DJI Mavic Pro Firmware Update Guide
Welcome to our DJI Mavic Pro Firmware Update Guide. Here you will find the steps necessary to update the Firmware on your Mavic Pro. Firmware updates can be daunting when doing them for the first time, but rest assured we will walk you through all the steps required to get a successful update. Let’s get your Mavic Pro updated. Firmware updates can reset all settings, so be sure you note the settings that are important to you prior to updating. Release Notes Release Notes for version v01.03.0200 Improved gimbal performance when flying in low temperatures. Added Cinematic Mode for smoother the footage. Release Notes for version v01.03.0000 Added AR route display in TapFly mode when used with the DJI GO 4 app. Added a vibration warning for the remote controller when the aircraft enters ATTI mode. Added wind speed evaluation and a high wind speed warning. Added more film looks and color modes (when used with the DJI GO 4 app). All Release notes (for current and earlier versions) are also available for download here. Mavic Firmware Update Steps Install the DJI Assistant 2 on your PC or Mac. Link >Here< Launch the Assistant 2 Software Ensure the Mavic has a charged battery Plug the Mavic into the computer with a USB Micro cable Turn on the Mavic Pro (Don’t forget to remove the gimbal brace from behind the gimbal) Select your Mavic Pro in the Assistant 2 Software Select the firmware update you would like to install in this case it was V01.03.0200 Click Start Update Let the Assistant 2 do its thing. The fans may turn on inside the Mavic for cooling. It’s a good idea to take off the gimbal cover to allow for sufficient airflow. The Software downloads the firmware update you selected The Software transfers the firmware update to the Mavic Pro The Software then finally installs/updates the firmware update onto your Mavic Pro Finally, when the updated firmware is successfully installed you will receive the following screen Please note you may not be finished! The remote control and the batteries could also require updating. Read on! Update the Firmware on the DJI Mavic Pro Remote Control Once you have updated the firmware on your Mavic Pro drone you can update the firmware on its remote control. Follow the following steps to do so: Ensure the remote control is fully charged. Connect the remote control to the PC or Mac using the microUSB cable you used for updating the Mavic Pro Power on the remote control Launch the Assistant 2 Software Select the “RC for Mavic Pro” Select the firmware you would like to updated onto...
Mavic Pro Unboxing – DJI’s compact drone
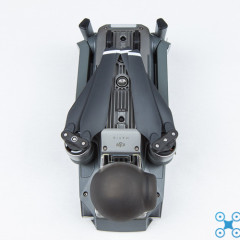
The new DJI Mavic Pro has revolutionized the drone industry. Up until now, the Phantom-class drone was as portable as you could get for good 4K Video and 12MP stills. The Mavic Pro changes this. Today we get to Unbox the Mavic Pro. Mavic Pro retail box First peak of the Mavic Pro Manuals and four (two for the front arms and two spares) propellers under foam packaging Cables and propeller bags removed from the retail box Everything laid out Top of the Mavic Pro drone without the front propellers installed Bottom of the Mavic Pro with gimbal cover and silicone protector still on. Right side of Mavic Pro Left side of Mavic Front arms extended into the flying position Rear arms in process of being folded out. This is about half-way unfolded to the flying configuration. Bottom of Mavic in unfolded flying configuration Top of Mavic in unfolded configuration. Mavic with front propellers and spare propellers laid out Front propellers matched up with color coded motor hub. Note the motor on the left side of the picture has 3 white stripes on the edge of the motors’ cans. The propeller with the white circle in the middle of the propeller hub goes on the motor with the white markings. The opposite motor seen on the right side of the photo, without stripes receives a matching propeller without any markings. Striped motor with matching propeller Propeller placed on top of the spring loaded motor shaft. You install the propellers by pushing down with a little force to compress the spring, then rotate until the propeller doesn’t spin further onto the motor. Releasing the propeller will lock it in place. If the propeller pops back up, twist the propeller into the other direction after pushing down on it. Installed propeller Other motor without white markings Installed propeller Mavic Pro with all four propellers installed Mavic with propellers unfolded. It literally can not get larger than this :) Gimbal cover without the silicone cap Close up of the gimbal, camera and gimbal cover. You can also see the front obstacle avoidance sensors. Left front arm of the Mavic with the Arm LED visible on the tip of the arm. Removal of the gimbal clamp and gimbal protector Gimbal protector being removed Gimbal without gimbal cover. Mavic Pro GL200A remote control Rear view of the Mavic transmitter/remote control remote control unfolded to accept smartphone or tablet. Rear of the remote control The lightning cable is installed by default for iOS devices, but a microUSB and USB-C cable are also included with the Mavic for Android devices. The bottom of the remote control. Note the Fullsize...


